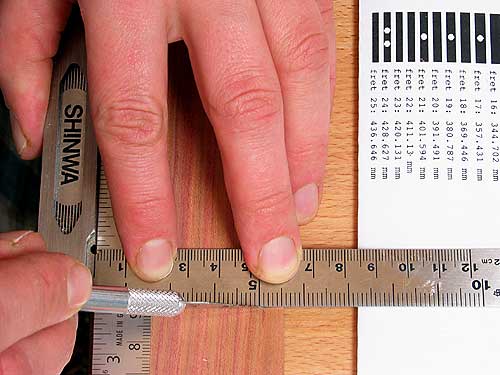
Using three small pieces of double-faced tape, fasten a rule
parallel to one edge of the fretboard so that the zero-mark of the
rule is about 1/8" (3mm) from one end. Cut the zero-mark into
the fretboard surface with a razor knife and a square. Continue to
mark all 24 fret positions on the fretboard surface. It is
obviously impossible to work to an accuracy of one hundredth of a
millimeter or one thousandth of an inch, so the figures will have
to be rounded up (5-9) or down (1-4) to tenths of a millimeter or
hundredths of an inch. Try to be as accurate as possible when
laying out the fret distances. When you have marked the zero-fret
and all other frets (plus an additional one for the fingerboard
end), double-check the distances by reading each position off the
rule and then comparing these values with the figures in the table.
If the two differ by more than 0.3mm or 0.012", the mark has
to be recut. If you use a ruler with 1/64"-marks, you may find
the six "nearest fractions" columns in the table on the
opposite page helpful. Simply add up the values of a line: the 14th
fret, for example, is located at 12" plus 15/32" plus
1/128" (1/128" being halfway between two
1/64"-marks). The "Result" and "Error"
columns show the small and insignificant deviations from the
calculated values.
Fret distances table in PDF format
Adobe
Reader required
![]()